
Custom Temperature Controller Prototype Validation: A Buyer’s Test Plan
Build a traceable prototype validation plan for a custom temperature controller, covering requirements, I/O, control sequences, faults, HMI, communications, environment, and pilot approval.
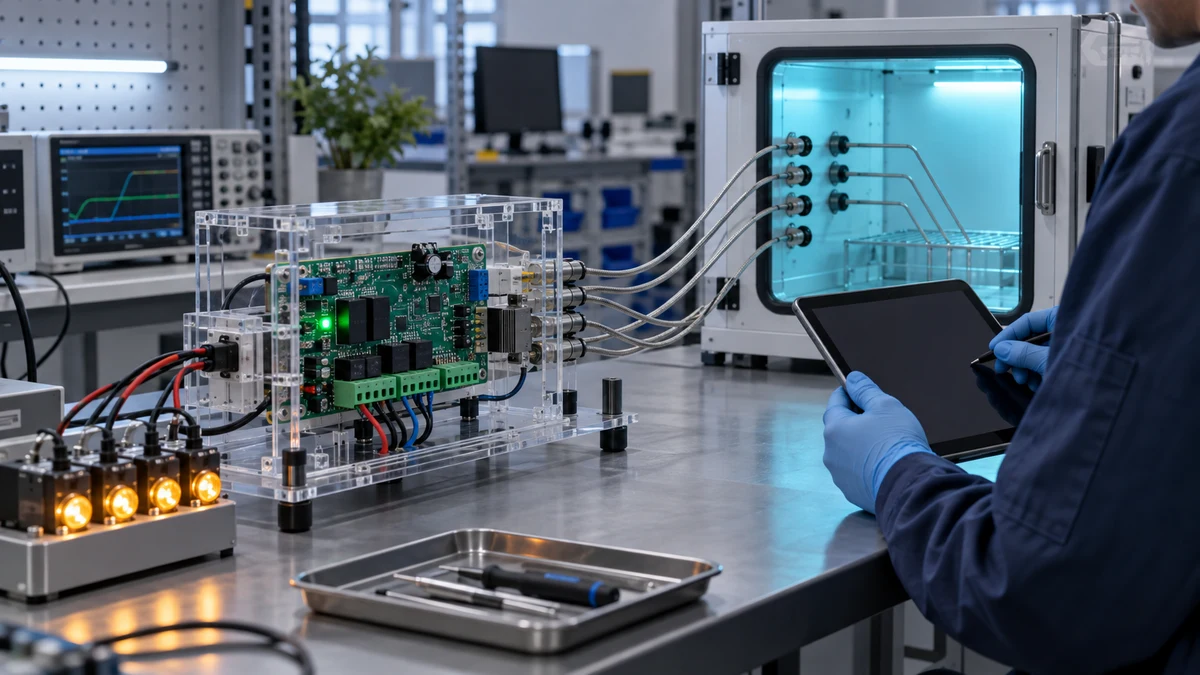
A custom temperature controller prototype should not be approved because it powers up, shows a plausible value, and switches one relay on the bench. Prototype approval is the point where a written requirement becomes objective evidence—or remains an unresolved risk.
This guide gives buyers, equipment builders, and engineering teams a practical validation structure. It is not a certification test plan and it does not replace the safety assessment for the finished equipment. It is a way to decide whether the agreed controller design is ready for the next controlled stage.
Verification and validation are related but different
Verification asks whether the prototype meets its specified requirements. Validation asks whether the resulting controller works for the intended users and application. NASA's systems-engineering guidance summarizes the distinction as objective evidence of conformance versus evidence that the system performs as expected in its intended environment (NASA Product Realization guidance).
Both matter. A menu may match its screen specification but still confuse a service technician. A temperature input may pass a simulator test but produce a poor control result when the probe is installed in the real airflow.
Freeze the test baseline before testing
Record the exact configuration submitted for evaluation:
- PCB assembly revision and approved component substitutions.
- Firmware build and parameter-default file.
- Display or HMI asset version.
- Sensor, harness, connector, enclosure, and label revisions.
- Communication map and configuration-tool version.
- The requirements and electrical drawings used for the build.
Photograph or label the test article and assign it an identifier. If any element changes during testing, record the new configuration and identify which results must be repeated. Otherwise, the final report may combine evidence from several different prototypes.
If the input package is still being prepared, use the OEM controller RFQ checklist to establish a baseline before building the matrix.
Build a requirements verification matrix
Give every required behavior a unique identifier and map it to a verification method. NASA's handbook appendix recommends a requirements verification matrix that identifies each mandatory requirement, its source, and how it will be verified (NASA Systems Engineering Handbook appendix).
| ID | Requirement | Method | Test condition | Acceptance evidence | Result |
|---|---|---|---|---|---|
| PWR-01 | Start in agreed safe state | Test | Minimum, nominal, and maximum specified supply | Output/status log | Pass/fail |
| TMP-03 | Detect the specified sensor fault | Test | Open and short conditions | Alarm and output trace | Pass/fail |
| SEQ-08 | Enforce compressor restart delay | Test | Repeated demand transitions | Timestamped state trace | Pass/fail |
| HMI-05 | Restrict installer parameters | Inspection/test | Operator and installer roles | Screen recording | Pass/fail |
Not every requirement needs a laboratory test. Some are verified by inspection, analysis, or demonstration. The method should be agreed before results are collected.
Test in layers
1. Physical build and documentation
Inspect dimensions, mounting, panel cutout, terminal access, connector keying, label content, harness length, enclosure fit, and the correspondence between the prototype and drawings. Check that service access does not require damaging cables or labels.
2. Power and reset behavior
Within the project's specified limits, test power-up, controlled power interruption, rapid restore, brownout behavior where relevant, parameter retention, watchdog or reset recovery, and the defined state of every output. Use protected equipment and competent personnel; prototype testing is not a reason to bypass electrical safety controls.
3. Inputs and sensor faults
Exercise each input across the required working range and at important boundaries. Test normal readings as well as open circuit, short circuit, out-of-range, unstable, and disconnected conditions where applicable. Confirm filtering, fault delay, alarm text, logging, recovery, and the output fallback.
For refrigeration applications, sensor placement can dominate system behavior even when the electronic input is correct. Pair bench evidence with an installation check using the cold-storage sensor placement guide.
4. Outputs and complete control sequences
Verify outputs with representative or safely simulated loads and the intended external switching arrangement. Do not test relays only as independent on/off points. Run complete sequences, including start-up, demand, defrost, drip time, fan restart, shutdown, service mode, and fault recovery where those functions are in scope.
Check timing boundaries and conflicting requests. For example, observe what happens when a temperature demand arrives during a minimum-off timer, or a sensor fault occurs during defrost. The expected priority must come from the approved sequence, not from an assumption made at the test bench.
5. HMI and user roles
Test each screen and menu path with the intended language set. Confirm units, decimal places, parameter limits, alarm history, acknowledgements, password roles, restore-default behavior, and what remains visible during a fault.
Ask a representative operator or technician to perform common tasks from a short instruction sheet. Record hesitation, wrong turns, and ambiguous wording as validation findings even when the formal screen requirements pass.
6. Communications and integration
For Modbus, test the agreed physical or network configuration, addressing, supported function codes, register permissions, scaling, signed values, byte and word order, exception responses, polling behavior, and recovery after loss of communication. The official Modbus application protocol defines function-code behavior and the protocol data model, while the product-specific register map still belongs to the project (Modbus specifications).
Retest with the actual PLC, BMS, gateway, or software client whenever possible. A desktop test tool proves only part of the integration.
7. Application and environmental validation
Use the real or representative machine, sensor installation, cables, contactors, actuators, and operating sequence. Cover normal operation, boundary conditions, expected disturbances, maintenance actions, and credible faults. Environmental conditions and test limits must come from the project specification and applicable product assessment—not from generic numbers copied from another controller.
IEC 60730-1 specifies construction, operation, and testing requirements for automatic electrical controls within its scope (IEC 60730-1:2022). Treat applicable safety and conformity work as a separate, planned stream. A successful engineering prototype test does not grant a certification or compliance conclusion.
Distinguish engineering, qualification, and production evidence
Use explicit names for each sample stage:
- Engineering sample: used to find design and requirement problems; rework may be acceptable if recorded.
- Design-validation sample: representative of the intended design baseline and used for agreed performance and integration evidence.
- Pilot-production sample: produced with the intended manufacturing process, work instructions, test fixture, and traceability controls.
- Production acceptance: checks applied to units or lots to confirm the released design is being built consistently.
These labels are project conventions, not universal certification categories. Define what each means in the purchase and validation plan.
Manage failures without losing traceability
Every failure should record the test ID, configuration, condition, observed result, evidence, suspected cause, disposition, owner, and retest requirement. Do not silently edit the firmware and overwrite the original result.
Classify the disposition:
- Requirement met after correcting the test setup.
- Product defect requiring a design change.
- Requirement ambiguity requiring buyer approval.
- Accepted deviation with documented rationale and scope.
- Test deferred because the necessary equipment or final machine is unavailable.
Approval should identify open deviations and residual actions. “All major functions work” is not an acceptance record.
A practical prototype exit review
Before authorizing pilot production, confirm:
- The tested configuration is identified and reproducible.
- Every required item has a result or approved open action.
- Safety- and equipment-protection behaviors have explicit evidence.
- HMI, language, communication, and service workflows were tested end to end.
- Application testing used representative loads, sensors, and installation conditions.
- Firmware, drawings, parameter defaults, manuals, and register maps match the approved build.
- Design changes are closed or transferred to a controlled next revision.
- Pilot acceptance tests and production programming files are defined.
How to scope a Beamform prototype
For a standard Beamform model, confirm the model-specific functions and interfaces in the applicable product documentation. Options described on the site still require confirmation for the selected model. Customized I/O, relay circuits, sensor interfaces, firmware sequences, HMI screens, communication maps, enclosure, labels, and packaging are evaluated against the project specification.
The prototype quantity, test articles, fixtures, iterations, validation responsibilities, certification work, cost, MOQ, and timing must be agreed after the scope and acceptance plan are reviewed. Explore the controller range, compare what can be customized, or contact Beamform with your requirements matrix and test environment.
FAQ
How many prototypes are needed?
There is no defensible universal number. It depends on test coverage, destructive or parallel tests, design maturity, manufacturing variability, and whether units must be integrated into several machines.
Can the supplier perform all validation?
The supplier can verify many controller requirements. The buyer or equipment manufacturer must still validate the controller in the real machine, installation, workflow, and target-market context.
Should every firmware change repeat every test?
Perform an impact analysis, then repeat affected tests plus an agreed regression set. Changes to shared timing, I/O, safety behavior, parameter storage, communication, or update logic may have wider effects than the edited screen or function suggests.
Is a passing prototype ready for mass production?
Not automatically. Pilot production should confirm that the released design, manufacturing process, programming, inspection, traceability, and acceptance tests work together consistently.